How to Perform a High-Quality Blood Smear
Step 1: Preparing the Blood Sample

Collection: Collect a small amount of blood (approximately 2 µL) using a microhematocrit, capillary tube, insulin syringe, or CTA. This volume should create a 4 mm diameter drop when placed on a clean glass slide.
Placement: Place the blood drop on the slide about 0.5 cm from the frosted end. Ensure the drop is centered and not too large or too small, as this affects the smear's quality.
Step 2: Making the Blood Smear
Choosing the Spreader Slide Angle: Hold a second slide at a 30-40 degree angle to the slide with the blood drop.
30 Degrees: Use this angle for thick blood samples or high hematocrit levels. It creates a longer smear, which helps to spread the cells more evenly.
40 Degrees: This angle is suitable for thinner blood or lower hematocrit levels. It produces a shorter, thicker smear, which can improve the visibility of cells in samples that may otherwise be too diluted.
Spreading the Blood: Position the spreader slide just in front of the blood drop. Using steady, even pressure, move the spreader slide forward smoothly and quickly. Maintain the chosen angle throughout to ensure consistent contact between the slides. Avoid pressing too hard, as this can cause cell distortion.
Step 3: Evaluating the Blood Smear
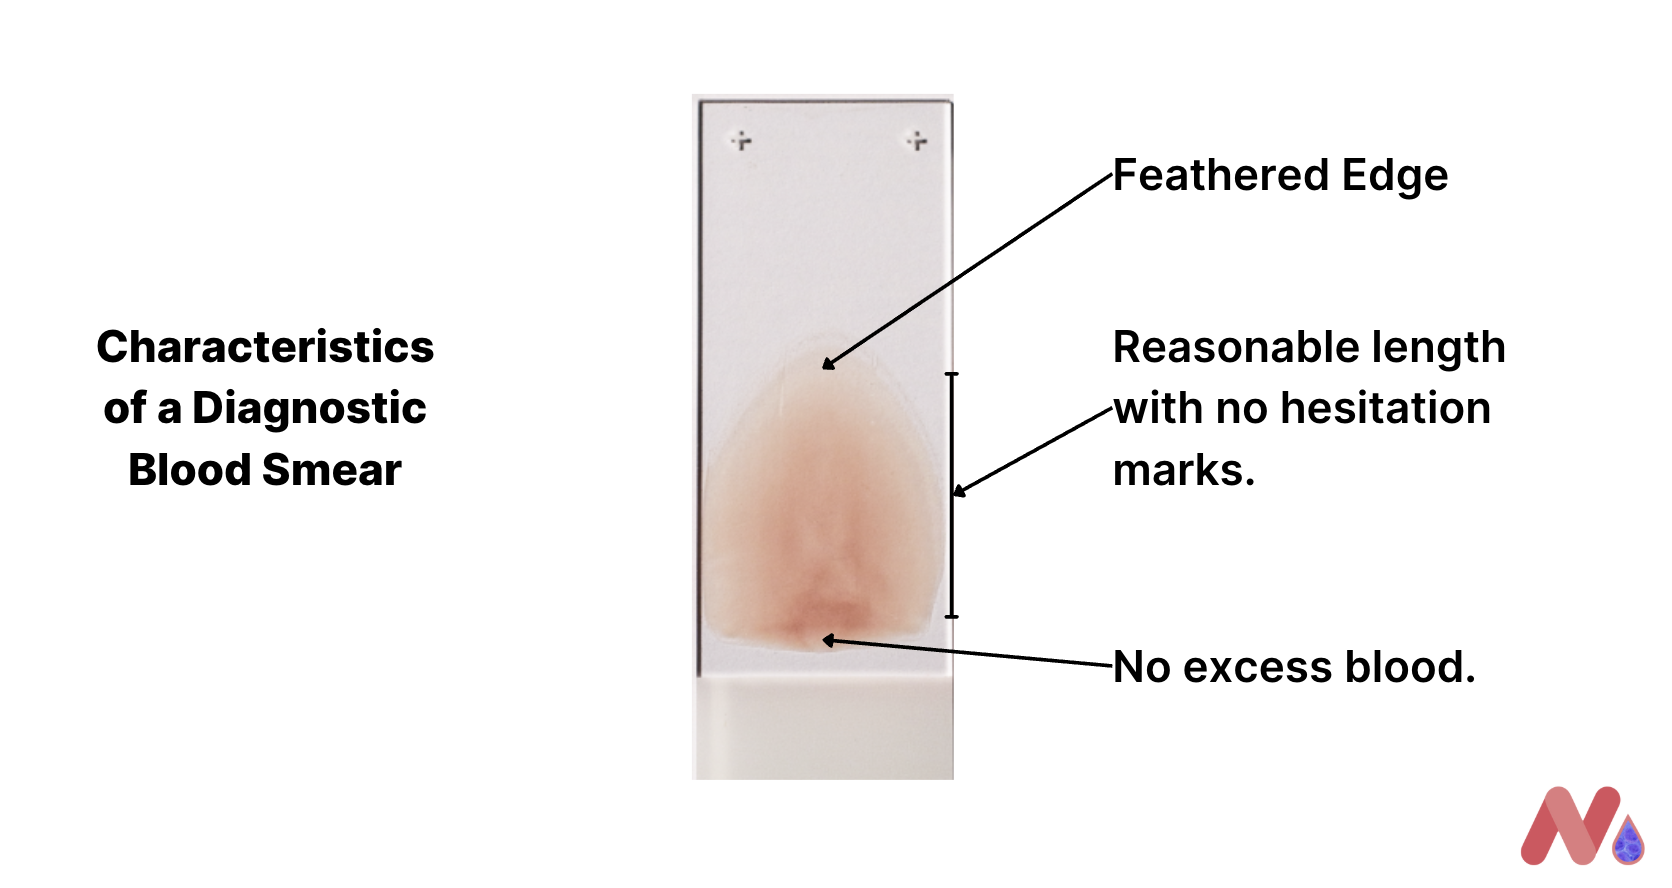
Ideal Smear Characteristics: The smear should have a smooth gradient from thick to thin, with a well-defined feathered edge. Cells should be evenly distributed, and no large clumps or streaks should be visible.
Adjusting Technique:
If the smear is too thick: Lower the angle of the spreader slide slightly or use a smaller drop of blood.
If the smear is too thin: Increase the angle or use a slightly larger blood drop.
If there are streaks or clumps: Reevaluate the pressure applied during spreading and ensure even, smooth movement of the spreader slide.
Step 4: Final Preparation and Storage
Blood Smear Storage: Do not refrigerate smears, as this can cause cell lysis. Keep smears at room temperature, and avoid exposure to formalin fumes, which can alter staining characteristics.
Making Additional Smears: If there is a delay in submission, make 2-3 additional smears to ensure that at least one remains suitable for evaluation.
Finer Adjustments for Better Diagnostic Outcomes
Adjusting for Sample Variability: Depending on the sample's characteristics (e.g., viscosity, cell count), fine-tune the drop size and spreading speed. Practice maintaining the optimal angle for different blood types to adapt your technique as needed.
Manual Cell Counts and Morphology: Always verify analyzer data with a manual review of the blood smear, especially if abnormalities are suspected. Look for subtle changes in cell shape, size, and distribution that could indicate underlying conditions.
By mastering these techniques and being attentive to finer details, you can significantly improve the quality of blood smears and their diagnostic value. Regular practice and adjusting your technique based on sample characteristics will enhance your proficiency and accuracy in hematological diagnostics(MSD Veterinary Manual)(Cornell Vet Med)(Today's Veterinary Practice).